Disclosure: This post contains affiliate links. If you make a purchase, we may earn a commission at no extra cost to you.
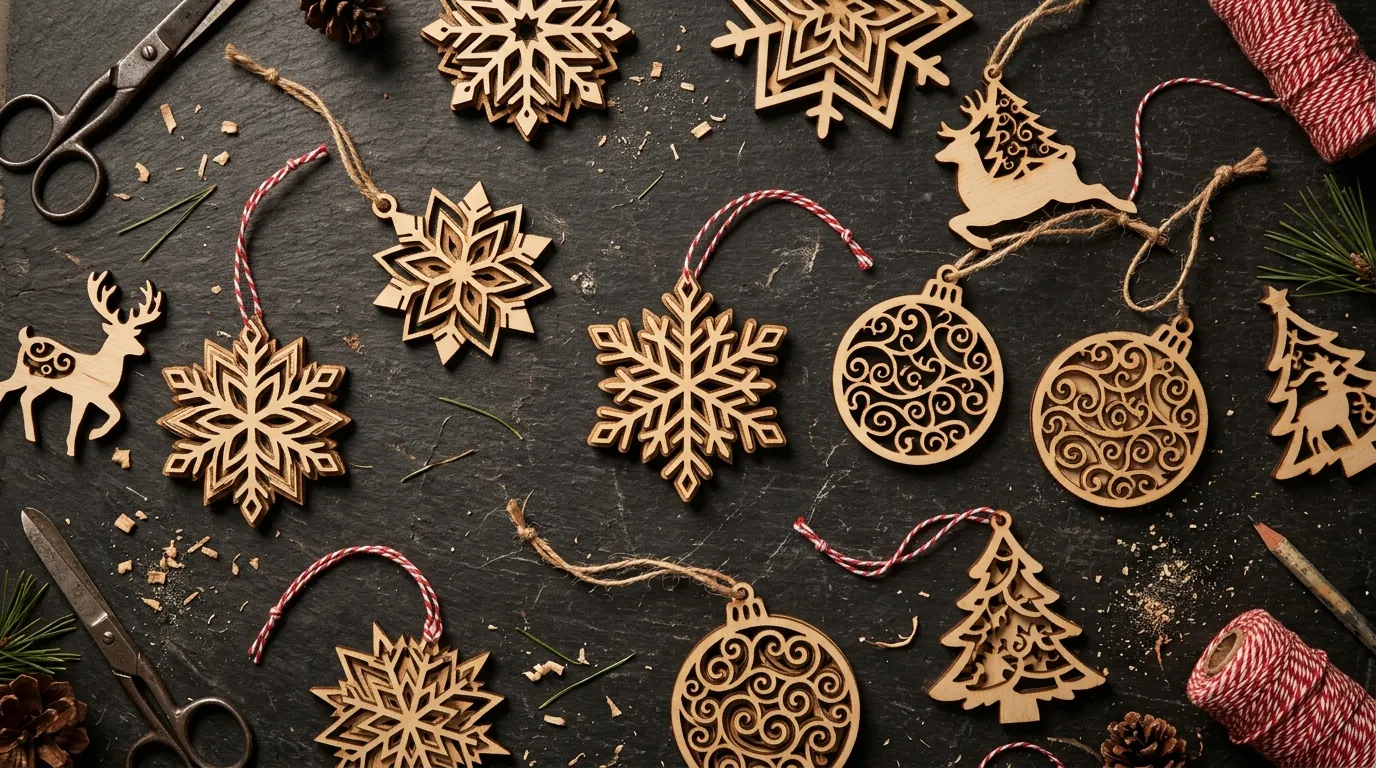
Every November and December, woodworking and craft marketplaces experience a massive surge in demand for handmade wooden Christmas ornaments. Personalized family name baubles, layered birch snowflakes, woodland wildlife silhouettes, and delicate 3D nativity scenes are popular laser-cut items on marketplaces and at local craft fairs.
For hobbyists and small shop owners, holiday ornaments are a popular seasonal product. Small round or flat designs nest tightly, so a single sheet of 3 mm Baltic birch can yield a whole batch of pieces. Cut time, material cost and sales all depend on your machine, your designs and your market, so time one sheet yourself and check what similar ornaments sell for.
However, holiday ornaments introduce unique technical challenges. Thin ribbon hanging loops snap under light handling, delicate interior snowflake fretwork burns away under improper laser power, and standard unmasked plywood leaves dirty resin smoke rings that ruin bright festive paint.
To turn seasonal holiday demand into reliable craft profits, you must master material selection, loop mechanical strength, multi-layer assembly, and fast finishing workflows. Here is the step-by-step workshop manual to design, cut, and finish professional wooden Christmas ornaments.
1. Structural Geometry: The Physics of Hanging Loops and Filigree
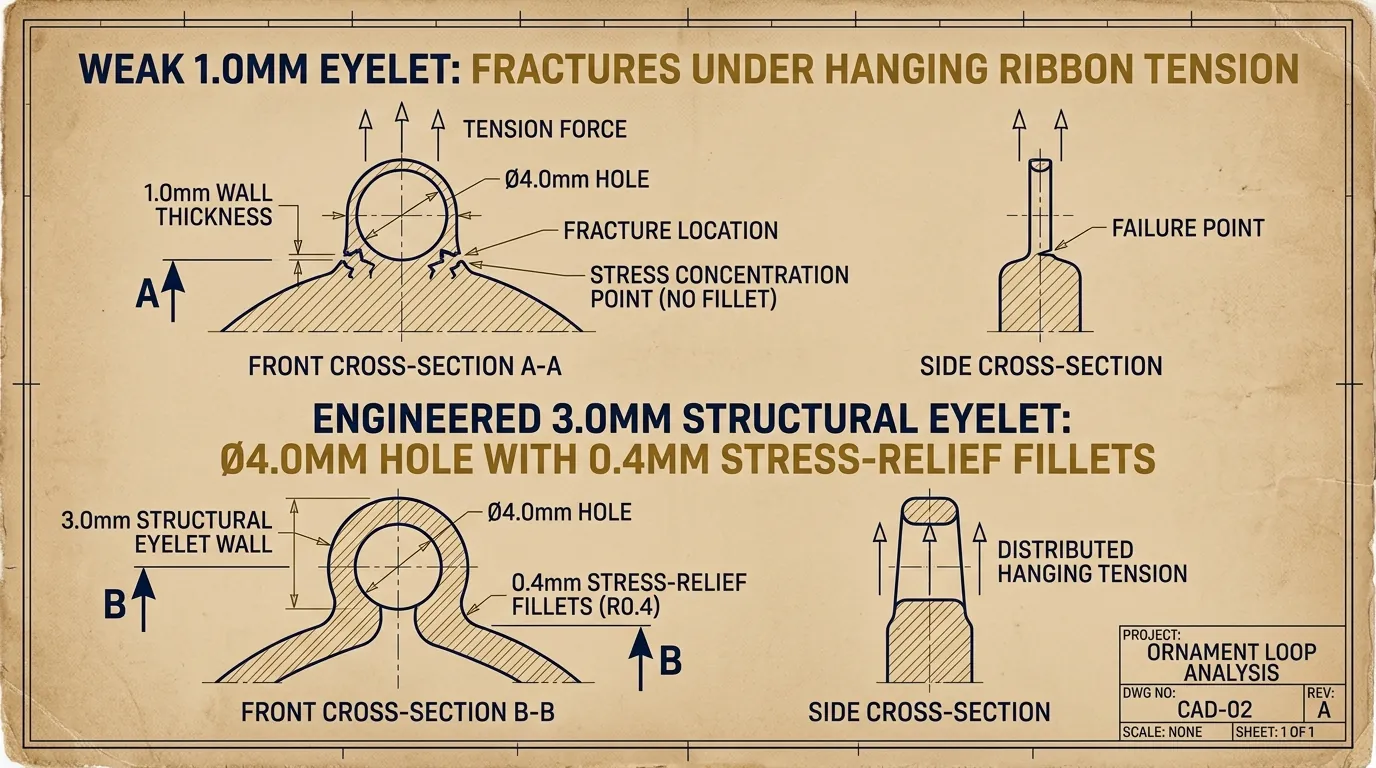
The number one defect in amateur laser-cut ornaments is a broken hanging eyelet. Beginners draw tiny 1.0 mm loops that fracture the moment twine or ribbon is threaded through.
Use these commonly recommended minimums when building or modifying holiday vector templates:
- Hanging Eyelet Wall Thickness: The outer ring of the top hanging hole must have at least 2.5 mm to 3.0 mm of solid wood perimeter on all sides. An inner hole diameter of 3.5 mm to 4.0 mm easily accommodates standard jute twine, festive baker’s twine, or metallic ribbon.
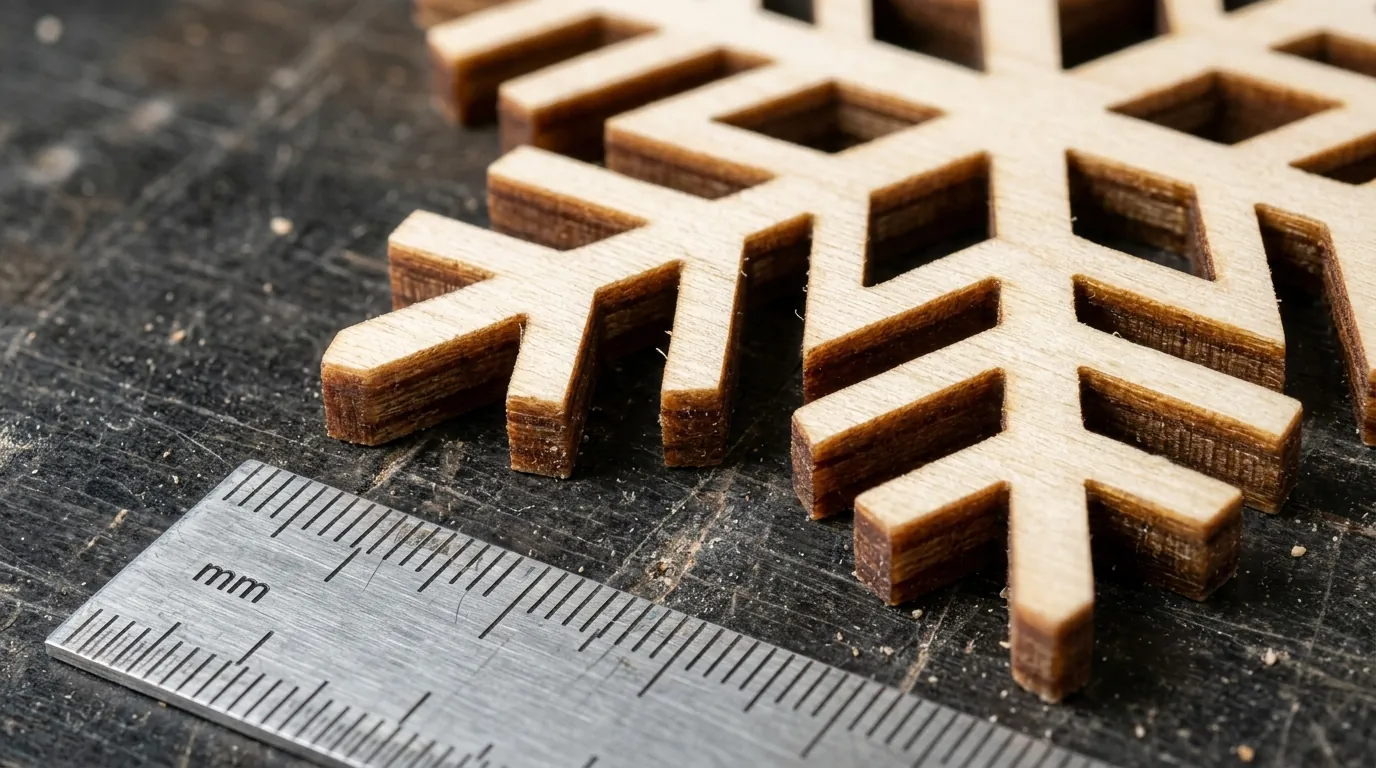
- Minimum Filigree Bridge Width: For intricate snowflakes and filigree stars cut from 3 mm Baltic birch, keep all positive wood bridges at a minimum width of 1.8 mm. Any web thinner than 1.5 mm risks burning through if your air assist jet wavers or your laser head decelerates in sharp corners.
- Internal Corner Radii: Avoid sharp, needle-like internal V-corners on snowflake points. Applying a microscopic 0.4 mm fillet radius distributes mechanical tension and prevents brittle winter fractures.
2. Material Selection: Baltic Birch vs. Basswood vs. Acrylic
Choosing the right substrate depends on whether you plan to leave the wood natural, apply vibrant stains, or incorporate multi-layer color contrast:
| Material Choice | Thickness | Edge Quality & Rigidity | Best Ornament Role |
|---|---|---|---|
| B/BB Baltic Birch | 3 mm (1/8″) | High tensile strength, clean amber edges with air assist | Single-layer snowflakes, hanging loops, structural base |
| Laser Basswood | 1.5 mm – 3 mm | Ultra-lightweight, zero char, absorbs wood stains evenly | Multi-layer 3D relief faces, delicate top filigree |
| Cast Acrylic Accent | 3 mm (1/8″) | Glossy, mirror gold or frosted, flame-polished edge (CO2) | Luxury contrast backer plates behind wooden silhouettes |
3. Step-by-Step Production Workflow: Batch Cutting 30 Ornaments
To make seasonal production profitable, avoid cutting ornaments one by one. Organize your cutting files into nested production sheets.
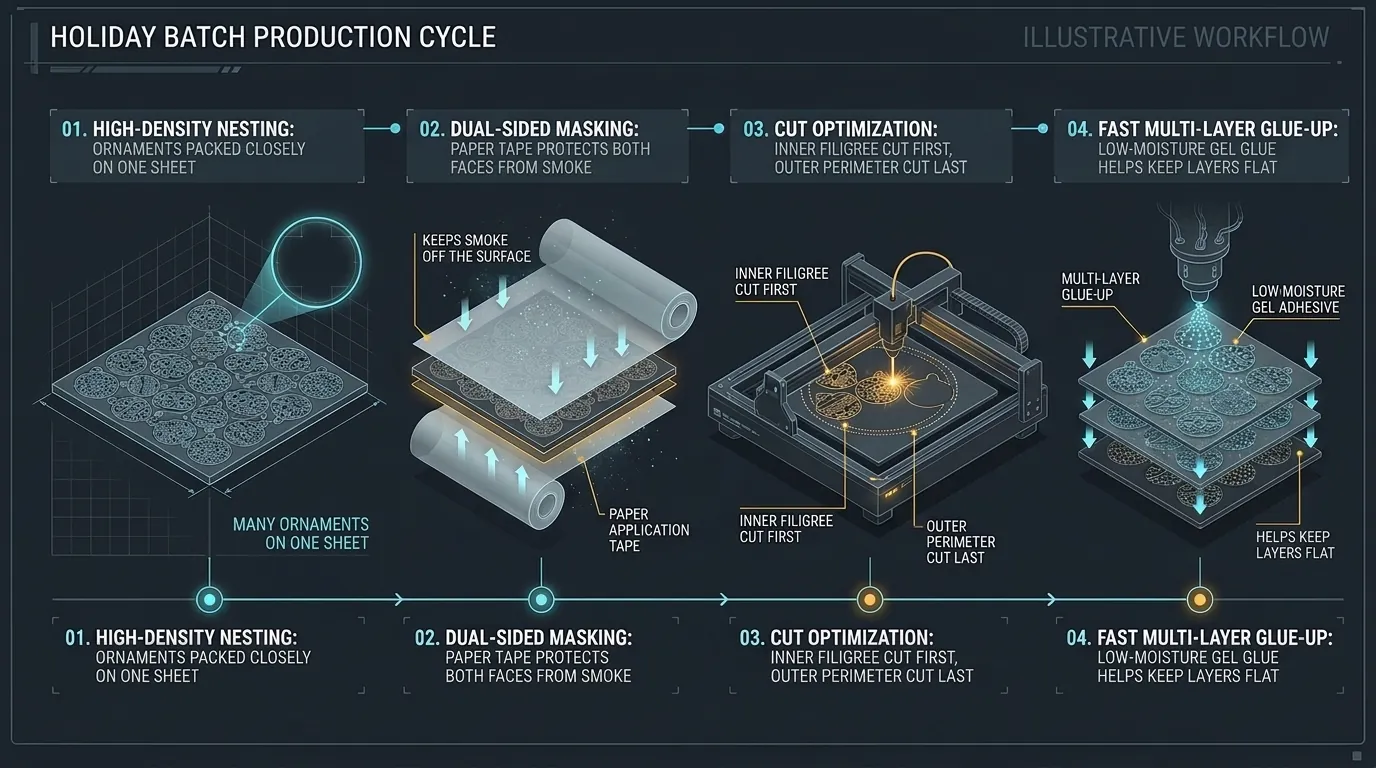
- Tight Vector Nesting in LightBurn: Import your ornament designs. Use LightBurn’s alignment and array tools to nest as many pieces as fit inside your bed boundary (for example, 400 x 400 mm). Rotate circular ornaments to pack them tightly, leaving a 2.5 mm safety buffer between adjacent cut paths to prevent localized heat buildup.
- Dual-Sided Masking: Apply wide paper application transfer tape to both the front and back of your plywood sheet before placing it on the bed. Paper masking keeps most smoke residue off the surface and helps prevent honeycomb grid marks on the rear face.
- Layer Optimization and Cutting Sequence: Set your cut priority in LightBurn to Cut Inner Polygons First. The laser must cut all internal filigree holes and the hanging ribbon loop before cutting the outer round perimeter. If the outer perimeter drops first, the loose ornament shifts slightly on the honeycomb bed, causing subsequent internal details to be off-center.
- Optimal Machine Parameters:
- Speeds depend on your machine, lens, focus and plywood, so run a speed and power test on scrap first.
- On diode lasers, expect to use full power with slower speeds or extra passes on 3 mm birch.
- Use air assist on every cut, at the airflow your machine’s manufacturer recommends.
Batch production tip: For batches, nest the pieces to waste less material, cut inner details before outer outlines, and time one full sheet on your own machine so you can quote lead times from real data.
4. Multi-Layer 3D Assembly and Fast Finishing
Single-layer flat ornaments are the entry-level product. Multi-layer 3D relief ornaments (featuring a background silhouette, a stained mid-layer, and a detailed natural top frame) can sell for noticeably more, but prices depend on your market and platform, so check what comparable listings charge.
Efficient Finishing Protocol:
- Batch Pre-Staining: For multi-layer designs, stain or paint full sheets of thin 1.5 mm or 3 mm plywood before laser cutting. Apply masking tape over the cured paint. When the parts emerge from the laser, peel the tape to reveal crisp, razor-sharp colored elements without tedious hand-painting.
- Low-Moisture Adhesive: Never use watery school glue or runny wood glues that cause thin snowflake points to curl. Use a thick gel PVA adhesive applied sparingly with a high-density foam roller, or apply a micro-thin layer of aerosol spray adhesive to the back of delicate layers.
- Rapid Clamping: Stack glued ornaments between two flat wooden cauls lined with wax paper and apply hand spring clamps for fifteen minutes to help keep the layers flat while the glue sets.
5. Personalization and Year-Marker Strategies
Personalized ornaments are a popular option during the holiday season, so it is worth building name and date variants into your templates.
Integrate these high-value personalization methods into your master templates:
- Family Name Cutouts: Use pre-bridged script typography centered across the middle of an open bauble frame. Weld the beginning and end of the name vector into the outer border ring by at least 1.5 mm.
- Commemorative Score Marks: Vector-score baby arrival dates, wedding years, or pet names onto solid wood backer layers using fast line marking (Score mode) rather than slow raster engraving. Scoring is usually much faster than raster fill.
- Double-Faced Keepsakes: Glue two mirrored 1.5 mm aircraft birch layers back-to-back around a central photo cutout, allowing customers to slide in a family holiday snapshot.

Frequently Asked Questions (FAQ)
What is the best hole diameter for holiday ornament hanging loops?
An inside hole diameter of 3.5 mm to 4.0 mm is ideal. It easily accepts standard 2 mm baker’s twine, jute rope, or satin ribbon without requiring a needle or wire guide, while maintaining maximum structural strength in the surrounding wood eyelet.
How do I prevent scorched edges when cutting delicate wooden snowflakes?
Three factors eliminate scorch marks: first, mask both faces of the plywood with paper application tape; second, run air assist to blow smoke out of the kerf immediately; third, support the workpiece on an elevated steel honeycomb bed to prevent rear flashback reflections.
Can I engrave names onto ornaments faster than raster engraving?
Yes. Instead of raster engraving (which sweeps the laser head back and forth across the entire piece for a few minutes), use single-line vector scoring (Score mode) with a specialized single-line stroke font. Scoring traces the letter vectors at high speed (low power) much faster, with a lighter line.